by Rick Rodgers, taken straight from Kaffeehaus
Cake
1/2 c all-purpose flour
3 tbsp Dutch-processed cocoa powder
1/4 tsp salt
3 tbsp milk
3 tbsp vegetable oil
1/2 tsp vanilla extract
3 large eggs, at room temp.
2/3 c sugar
Filling
2 tablespoons golden rum or water (I used white rum)
1 1/2 tsp unflavoured powdered gelatin
1 tsp vanilla extract
1/2 cup confectioners' sugar
1/4 cup Dutch-processed cocoa powder
2 c heavy cream
Glaze
1/4 c hot water
3 ounces high-quality semi-sweet chocolate, finely chopped
1 tbsp unsalted butter, at room temperature
1/3 c apricot glaze, warm
1. For the cake: Put rack in centre of oven, and heat to 350 C. Lightly butter a 15 x 11-inch jelly roll pan, and line the bottom and sides with parchment or wax paper. Cut slashes in the corners of the paper to help them fold neatly. Lightly butter the paper.
2. Sift the flour, cocoa, and salt together into a bowl. Mix the milk, oil, and vanilla in a measuring cup.
3. Crack the eggs into a medium bowl and add the sugar. Using an electric mixer on high speed, beat until very light in colour and textgure, about 2 minutes. Sift half the flour mixture over the eggs and fold in. Fold in half of the milk mixture. Repeat with the remaining flour and milk mixtures. Spread evenly in the pan, being sure the batter fills the corners.
4. Bake until the cake springs back when pressed in the centre, about 15 minutes. Cool for 5 minutes on a large wire rack. Invert onto the rack and peel off the paper. Cool completely.
5. To make the filling: Pour the rum into a small bowl and sprinkle with the gelatin. Set aside for 5 minutes. Place the bowl in a skillet of gently simmering water. Using a small rubber spatula, stir constantly until the gelatin is completely dissolved, being sure to wipe down any undissolved gelatin on the sides of the bowl. Remove the bowl from the water, stir in the vanilla, and set aside to cool slightly.
6. In a bowl, combine the confectioners' sugar and cocoa. In a chilled medium bowl, beat the cream until it just begins to thicken. Sift the cocoa mixture into the cream and beat until barely stiff. Stir about one third of the whipped cream into the gelatin mixture, then beat back into the cream, beating until the filling is very stiff. (But do not overbeat, or it will separate.)
7. Cut the cake into two 7.5-inch wide pieces. Place on cake on a baking sheet. spread all of the filling on the cake in a thick layer, smoothing the sides. Refrigerate while making the glaze.
8. To make the glaze: Combine the water and chocolate in a small saucepan. Cook over low heat, stirring constantly with a rubber spatula, until the chocolate is almost melted. Remove from the heat and let stand, stirring occasionally, until the chocolate is completely melted. Add the butter and stir until melted and combined. Set aside to thicken and cool slightly.
9. Place the remaining cake layer, smooth side up, on a wire rack set over a jelly-rolll pan. Spread the apricot glaze over the cake and refrigerate to set. Pour all of the glaze on top of the cake. Using a metal spatula, smooth and coax the glaze over the sides, smoothing the glaze on the sides of the cake. Refrigerate until the glaze is set, about 15 minutes.
10. Using a thin, sharp knife rinsed under hot water between cuts, cut e the glazed cake into 9 rectangles. Following their original positions, arrange the rectangles on top of the filling. Refrigerate until the filling is set, about 1 hour. Cut between the rectangles to make individual servings. Serve chilled.
The mousse squares can be prepared up to 2 days ahead and stored under a cake dome in the refrigerator.
Apricot glaze
1 1/4 cups apricot preserves (jam?)
2 tablespoons golden rum or water (I used water)
Bring the preserves and rum to a boil in a small saucepan over medium heat, stirring often. Cook, stirring often, until the last drops that cling to the spoon are very sticky and reluctant to leave the spoon, 2 to 3 minutes. Strain through a wire sieve into a small bowl, pressing hard on the solids. Use warm.
Sunday, October 3, 2010
Tuesday, September 21, 2010
Dateline: Budapest - Rigo Jansci!
Life's funny sometimes.

Just a month ago, if you were to ask me to describe Hungarian food - or, even, anything about Hungarian culture - I would probably be dumbfounded to offer anything outside of "paprika" as my answer. And even with that, truthfully, I would mostly be reminded of the absolutely amazing Satoshi Kon film (RIP Satoshi Kon, BTW, the world lost one of the best there was.) Second to paprika, I would probably think "some sort of really smelly sausage", courtesy of the boyfriend's penchant for using it in the Brazilian delicacy feijoada. Finding the Hungarian deli in town was one of the best days of his life, no doubt, but to me...meh.
But then, as luck would have it, we got ourselves a new room mate. A Hungarian! From Hungary! He's a P.h.D. student in Hungarian history, which makes a nice, and hilarious, contrast to the M.Sc. I'm chugging along on. He isn't a huge fan of the indigenous Hungarian food as I would have assumed, but he came with all sorts of melodrama when I found this:
Yep..another dessert cookbook! From the library, too! I bet you're all dumbfounded by that complete surprise. This book has "Ira" written all over it, for 1) the recipes, and 2) the blatant and gorgeous use of Art Nouveau design, typography, and embellishments within. Love it!
I showed the book to my roomie, making sure to point out that "Budapest" was on the cover, and then instructed him to choose something that was within my capabilities to bake for us. This was my chance to bake something Hungarian, expanding my repertoire to a whole TWO items.
After some consideration, we decided on Rigo Jansci (REE-go YAHN-shi) (again, blogger fails in the accent department - there should be one on the i). This translates to "Johnny Blackbird" in Hungarian. Yes, I know. It's weird, but at least there's an explanation.
Like many European desserts, this one is named after a person. And not just any person! Johnny Blackbird was, apparently, a gypsy violinist. And not just any gypsy violonist, but the most attractive gypsy violinist ever.
The story goes that in the late 1800s, Johnny was playing violin at a hotel in Paris. Watching his performance was the (former) Klara Ward - a milliionaire's daughter, and wife of Baron Chimay. Upon seeing Johnny, Klara was so taken with his good looks that she went so far as to take off her wedding ring and place it on his pinky. Can you believe that! 200 years later, that's some racy shit! I mean, really! Taking off your wedding ring IN FRONT OF YOUR HUSBAND, and putting it on some RANDOM MUSICIAN'S FINGER?! My God...
Anyways, she left her husband and two kids (ach!), and joined Johnny on his travels. Then, some Hungarian pastry chef named a "sinfully" chocolate dessert after him. Surprise surprse, the marriage didn't last, and he faded into obscurity. But Rigo Jansci, the dessert, did not.
Rigo Jansci has everything a chocolate lover would...well, love. It's like a chocolate sandwhich: chocolate sponge cake is the bread, and the "meat" (or whatever) is chocolate whipped cream, spiked with a bit of rum. On top, there is a chocolate glaze to make everything pretty. Admittedly, though, this isn't the super mega heavy chocolate orgasm that I was thinking. Actually, the chocolate taste is a bit subdued. I guess this is more representative of what the European tortes are like - more of an emphasis on texture and flavour combinations than overwhelming, huge, heavy cakes that North Americans are accustomed to.
 |
| Photo: Ira Sherr |
And just to make sure things are going according to plan, I was able to double-check the appearance against an adorable watercolour from Cakespy.
 |
| Image: Cakespy |
Yep, things check out. Phew!
The dessert isn't too difficult to make, either. But be warned, these tortes (and their similar desserts) are an exercise in preparation and assembly. There are a number of different components to make, so take some time to plan (ie. don't start this at 9 PM). The other somewhat comforting thing about these kinds of desserts is that they are all based on sponge cakes, so they are somewhat healthier for you (right? right?), and take far less time to bake. One baking sheet of sponge was prepared in about 10, and bakes in 15 minutes, and that's all you need for this recipe.
Perhaps the biggest victory for my Rigo Jansci was that I managed to impress some people! Apparently the roomie's coworkers - who may or may not be from Hungary, but know of said dessert - tried some and were pleased with the results. Diplomacy win!
In light of that, do expect more central European desserts in the future. Especially because Kaffeehaus is a phenomenal body of baking work.
Saturday, September 18, 2010
Rugelach...for "When the Schnecken Beckons"
In further efforts to re-create the noshes of my youth, today's project are Rugelach.
 Rugelach are small, flaky pastries with a filling that contains any of chocolate, cinnamon, currants, and walnuts. And although they can look somewhat impressive and professional, you'll be pleased to know that the baking and assembly is quite simple.
The dough is made from a 1:1 mixture of butter to cream cheese, which makes them extremely flaky and, obviously, ridiculously fattening. Just do yourself a favour and pretend that we live in an age where nutritional information simply doesn't exist on food packaging, okay? You`ll want to make sure that the butter and cream cheese are beaten together for a good length of time so as to maximize the prospects of a delicious dough.
Traditionally, Rugelach are made by rolling the filling and dough into a large log, and slicing the cookies into small pieces. Case and point, the recipe I followed suggested this, but I decided to deviate on account of a) those pieces are too close to bite-sized morsels for comfort and/or portion control, and b) small spirals are prettier. I mean, really. Not wanting to end my rebellious streak there, I opted to replace the currants with semi-sweet chocolate chips, because I am crazy about the chocolate/walnut/sugar combination, and currants just seemed a bit...I dunno...healthy?
Now, I was always under the impression that Rugelach and Schnecken were one and the same, but the good folks over at Schnecken Connection (Ira's endorsement for Best Name Ever), set the record straight: "Schecken" meaning "snail" in German, are pastries that are rolled (like mine), whereas Rugelach are result of the ol' log-and-slice technique above. Additionally, Schnecken are made with sour cream, and Rugelach of cream cheese So, I guess I really made a Rugelach-Schecken hybrid? The important thing is, we still have our health, and both these pastires descended from immigrant European Jewish communities.
For those not familiar with delicious, heart-attack inducing pastries of the Jewish heritage, you may remember them from their brief cameo in the 1996 film The Birdcage.
 |
| Photo: Ira Sherr |
I have to give respect to Kate Zuckerman for this recipe - the butter-cream cheese dough is off the hook! I'm not sure how much it deviates or borrows from "traditional" rugelach recipes, but this is the first time I've made these, and I'm very pleased with the results. True to her claims, the dough is very flaky, but also has a nice sourness to it that is heavily addictive. I only wish that I had stuffed an irresponsible amount of filling into these little guys in order to maximize the flavour profile and play off the dough better. For those baking along at home, I would recommend at least doubling -- or even tripling - the dough recipe. I have nearly 3/4 of the filling left over, currently residing in my freezer. Thankfully, it's delicious and is one of those guilty pleasures you could just eat by itself. Or if that seems too uncivilized for your tastes, you could probably dump it into yogurt for a sugary, impromptu `granola`.
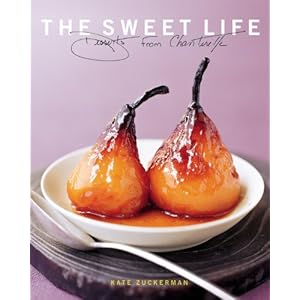
The recipe was taken from The Sweet Life, which is an amazing resource. More to the point, Kate is really friendly and very helpful - I know this because she's actually returned my emails! If you are looking for a dessert cookbook with solid, impressive recipes, I would highly recommend it.
Let the Schecken beckon!
Saturday, September 4, 2010
P is for Praxis...and Pfeffernusse
 So, I've been doing some thinking these past few days.
Thankfully, I won't bore you with details, but the gist is: I have decided that I will start posting about my baking endeavours. Not that I intend bakegeek to be a play-by-play of what comes out of Ira's oven, but I want to share recipes and stories and successes (and occasional failures) with you all.
Without further delay, on with the show!
I picked up Greg Patent's wordly, "A Baker's Odyssey" at my super top secret source for cheap cookbooks, and I've been really impressed with it. Long story short, it celebrates America's immigrant heritage by going straight to the source for passed-down, ethnic creations that come from a variety of different Motherlands. There are tons of great recipes in here: breads, flatbreads, cookies, pies, yeasted breads, etc., and they come from as wide a range of countries as you'll probably find in any baking book (Germany, Sweden, Greece, Italy, Norway, Syria, Israel, Ireland, Lithuania, etc).
As I've always been one for learning about different cuisines, I was thrilled at the chance to bake from different cultures, as well. At this point, I've only had time to bake two recipes (I blame Committee Meetings), but there will definitely be more to come in the future. For now, I'm going to share the latest and greatest: Pfeffernusse. There should be an umlaut (sp?) on the u but I can't figure out how to insert it in Blogger's word processor.
 |
| Photo: Adam Dombovari |
Pfeffernusse translates literally to "Pepper nuts", which means these cookies are a spicy little number, loaded with...you guessed it..nuts. Well, this recipe is a bit of a deviation from tradition, as they don't contain pepper or nuts (I haven't yet found whole, shelled walnuts to bake with, and I have a peanut allergy which makes me paranoid). Thankfully, there is more than enough flavour to compensate for both parties. The cookies utilize one of my favourite flavour combinations or cinnamon, nutmeg, and anise to give that lovely, deep, magical spiciness that does, in fact, remind me of the winter months. The spiciness even gets help from ground coriander seed, which works so well I turned a blind eye to the fact that I hate that vile plant and all of its associated life stages (Coriander = the seed of Cilantro - FACT). If you love that Spice Axis (think gingerbread), you'll enjoy these for sure.
The base of the cookie is a combination of honey, sugar, and butter, which gives a nice thickened cookie and a subtle sweetness. After baking into little domes, the cookies are glazed with icing sugar and then rolled...in more icing sugar. At this point, they kind of do resemble little igloos as the recipe indicates. The intense sweetness of the icing sugar makes a great contrast to the wonderful deep spiciness of the cookie. The texture is quite nice, too. After two days the cookies are a wee bit firm, but overall chewy. Apparently they can keep for two months, so this is something you can bake a good deal in advance and save...if you had that mysterious "self control" thing I hear so much about.
As for "A Baker's Odyssey" find out more here. I highly recommend it if you're a fan of home-baked goodness.
Friday, August 20, 2010
DIY Vanilla Extract
 |
| Photo: vanillareview.com |
In all honesty, I had never seriously considered making my own vanilla extract. I couldn't seem to reconcile the time and expense required in homebrew with the opposing ease and convenience of buying it from the grocery store.
But I wanted -- nay, needed -- anise extract. And I couldn't find it in my local grocery stores.
And I had just bought a whole bag of star anise on the cheap.
So I started searching for DIY anise extract recipes. And I found one or two, but I also found the goldmine: the Make Vanilla Extract tutorial on vanillareview.com. It is so popular that the site branched off from its own Instructable! And it's even getting shout-outs in the press!
This is easily the most comprehensive, detailed, and informative tutorial on making vanilla extract. Anywhere. And it seems pretty straightforward to me. There are tons of pictures, so all you visual learners can breathe easy. Unlike so much of anything on the internet, the site actually pulls from a really solid body of research to provide its background information. Yes, that includes literature reviews. Yes, there are even literature reviews on vanilla. No, you can't just quit your soul-crushing research job to go study vanilla all day.
What is the most impressive, though, is that Ian is a serious sommelier! Check out his pages for salt, cinnamon, and paprika, in addition to all things vanilla.
Tuesday, August 10, 2010
Royal Icing = Egg White (Powder) + Confectioner's Sugar. Full Stop.
 |
| Photo: Gail Dosik |
1. Gail uses egg white powder, and not, under any circumstance, meringue powder. As she rightly points out, royal icing is just egg whites and confectioner's sugar, and meringue powder is loaded with unnecessary ingredients (cornstarch, calcium sulfate, artificial flavours, whiteners, etc.). The hardcore purist in my totally agrees with this, and once you read her thoughts gleaned from years of experience, you probably will, too.
2. The "royal" is mixed to the desired consistency for each project. The project dictates the icing. This is a great point: we shouldn't always assume that the one recipe we have will make the perfect icing for each project.
3. Um, she is hilarious! Honestly, I love her to pieces already. And she's been around! This woman knows her stuff, so it's best we all pay attention.
The World's Longest Video About Making Royal Icing [via University of Cookie]
Saturday, August 7, 2010
"Wants" vs. "Needs": Infrared Thermometers
 |
| Photo: Stuart Selby |
Hang on. Infrared. Thermometer? What the?
You're all probably confused as I was only a week ago. So, in the first installment of bakegeek's "Wants" vs. "Needs" series, we're going to examine these handy, super-industrial-cum-ingenious-baking tools. "Wants" vs. "Needs" is an opportunity to examine and highlight useful baking tools or equipment that bakers are currently coveting, but can't quite justify purchasing...yet.
 |
| Photo: Stuart Selby |
Needless to say, I lost it. What was this? You fire a laser at your batter and it checks temperature?! Judging by the other facebook comments, I wasn't the only person who was duly impressed. So, I did some digging to find out what I could about this little kitchen gadget that I can't live without.
What is an infrared thermometer?
All objects are made of particles, and above 0ºC all particles in an object vibrate. As these particles vibrate, they emit infrared radiation (IR). Infrared radiation is part of the electromagnetic spectrum, having a longer wavelength (lower energy) than visible light or UV radiation. The hotter an object is, the more its particles vibrate, and the more energy is released as IR. A good visual example of this phenomenon is when certain metals are heated to extremely high temperatures, becoming red- or white-hot. The colour we see is actually energy being emitted from the metal in the form of visible light, due to the very high energy the object has from being heated.
Simply put, an infrared thermometer measures the infrared energy emitted from the surface of an object, and translates this energy into a temperature reading. The laser in the photos above is actually only there to help you aim properly. I know, I was shocked too.
Why should I be fantasizing about one?
Infrared thermometers aren't anything particularly new. The technology is commonly used in industrial operations to measure temperature data from objects that would be a nightmare for traditional thermometers. For example, objects that cannot be touched for reasons of safety; objects at a distance; moving objects; or objects in a vacuum, are all instances where IR can be used to measure temperature.
IR thermometers are also already used in the food service industry (I just hadn't realized), to ensure that delivered food palettes and storage equipment retains a desired temperature. This makes sense, because temperature data can be scanned quickly and repeated contact with food is avoided.
For the personal kitchen, a tool like this may seem like overkill. But the more that I think about it, the more I realize that it's a brilliant tool to have around - Stu was on to something! Because IR thermometers are contact-free, you can measure just about anything without having to worry about contamination, personal safety, or cleanup. I know that sugar thermometers exist, but honestly, I don't want to handle anything that's been sitting in liquid over 100ºC. I'm klutzy and I've burned myself too many times. Plus, once boiling sugar hardens it is a nightmare to remove. With an IR thermometer, a simple point-and-shoot is all you need to make sure you're at the softball (or whatever -ball) stage you need. Plus, IR thermometers can take multiple readings in a much faster time than contact thermometers. You gotta be efficient in the kitchen, right?
But why stop at food? With an IR thermometer you can easily measure the temperature of your oven, forgoing the need for a special oven thermometer. What about your pots and pans? Now you'll always be sure that your surfaces are exactly the correct temperature for grilling or stir-frying. No more messing around with the "sizzling water" trick (which in retrospect, seems horribly inaccurate for temperatures over 100ºC). Obviously though, you shouldn't rely on IR to test if meat is the correct temperature. Don't toss out that meat thermometer!
What's the damage?
If you're reading this post and live in Canada, I would strongly recommend catching the Canadian Tire sale linked above. Who knows, maybe they ship internationally, too?
From my superficial research, a good, lower-level IR thermometer will set you back about $100. To be fair, this does seem like a substantial investment, but I think it's worth it. The fact that you can replace multiple thermometers with it will already save you anywhere from $10-20 bucks for each one you will render obsolete (candy thermometer, oven thermometer, etc.). They're extremely easy to use, don't require clean-up, and I think you will easily become addicted to using it once you start ("Wow, this garbage is waaay above room temperature. Time to toss it!")
Higher-endl infrared thermometers only go higher in price, to the point of industrial models that can measure hundreds of degrees in Farenheit. I would avoid these. On the low end, I've seen "pen" format IR thermometers for about $30, so there is a spectrum to fit most budgets.
I know I've already convinced myself. Quick, easy, safe, and zero cleanup? Why didn't bakers think of this sooner?
Thursday, August 5, 2010
Geek Out! Science Cookie Roundup #6 is Here!
 Hot off the cookie sheet and the blog engine, it's the sixth installment of Not So Humble Pie's brilliant Science Cookie Roundup! Yes!
These roundups, to me, represent what bakegeek is really about - unashamedly combining your interests (no matter how geeky, revealing, or embarrassing) with your love of baking. Truthfully, seeing some of these roundup submissions was the tipping point that made me decide to really give bakegeek a try. I thought I was the only one who would be totally impressed with a yeast two-hybrid screen cookie. Apparently, I was wrong.
 Warning: in true pedantic fashion, many of these submissions are extremely specific to a certain area of science. There's a good chance that you won't "get" a large part of them if you don't have a specific background in science yourself. On the other hand, maybe that's a good thing? There's nothing quite like spending your days enslaved to a gel electrophoresis box, only to look at gel electrophoresis cookies and feel a like you want to vomit, cry, and curl up in the fetal position at the same time. Trust me.
Regardless of your background, you bakers out there can appreciate the thought, humour, and well-executed decoration that goes into many of these projects. Right? Right.
Tip: send these to any scientists or grad students you know for instant "Hey, you understand what I'm talking about!" cred. Even if is, in reality, a complete charade. I, for one, would be ecstatic.
Science Cookie Roundup #6 5 4 3 2 1 [via Not So Humble Pie]
Wednesday, August 4, 2010
Ratio: The Simple Codes Behind the Craft of Everyday Cooking - Michael Ruhlman
 I first heard about this book when it was released "a while ago" (ie. I can't remember when), but now that I managed to track it down at the library, I'm thankful I didn't forget about it. Simply put, Michael Ruhlman does a fantastic job of breaking down the importance of the ratio in everyday cooking. You may or may not notice, but the majority of recipes out there, especially in the baking world, all rely on precise ratios of ingredients (usually involving flour, eggs, sugar, and fat of some sort) in order to create the finished product we are expecting. Most people (myself included) hadn't realized this (or haven't gone to pastry school) and as such develop pathological inflexibilities when it comes to following recipes, or convincing themselves that they just Can't Bake It. Up until a month ago, I had a Pathological Fear of Pie Crust. True story.
Ruhlman abandons the traditonal cookbook approach, because after all, this isn't really a cookbook. This book is about understanding fundamental ratios. Once you can grasp the ratio of a cake or dough or crust, it's like you've been liberated. It doesn't matter what kind of flavours or accessory ingredients you add, as long as you maintain the ratio, you will always get the proper finished product.
Or, as the inside cover puts it, "When you know a culinary ratio, it's not like knowing a single recipe, it's instantly knowing a thousand."
So, Ruhlman does an excellent job of explaining what the ratio of each "recipe" is all about, and offers some helpful hints on varations you can try. For example, the ratio for Bread Dough = 5 parts flour : 3 parts water (plus yeast and salt). Once you have that down, you can extend it to make garlic bread, white sandwhich bread pizza dough, etc. Basically, the possibilities are endless!
I love this book for this exact reason. I love to bake, but because I have no formal training I find myself more or less hoping for the best, especially with new recipes, and especially with things like pastry. But, now that I can have a better understanding of the ratios that lead to the finished product, I'm really free to experiment with the knowledge that I really can't go wrong. Which is a great feeling.
Fun fact: Did you know that a pound cake and a sponge cake both have the exact same proportions of eggs : fat : sugar : flour (1:1:1:1)?! Isn't that crazy! The difference is all in the order that you add the ingredients, not necessarily the ingredients themselves.
That alone, to me, makes the book worthwhile. Geek out!
Tip: DIY Cornets (Paper Piping Tubes)

Over at Confections of a (Closet) Master Baker, Gesine gives us a nice lowdown on how to make cornets (paper piping bags) by hand - including some very informative photographs. But why bother at all? Well, they give you a fantastic degree of precision, especially when piping fine lines and detail. Also, as she cleverly points out, you can microwave them (they're just parchment paper, right?) So next time you want to pipe some melted chocolate, don't bother with a clumsy, awkward pastry bag, make a cornet!
Photo: Gesine Bullock-Prado
Subscribe to:
Posts (Atom)