Tuesday, March 29, 2011

Daring Bakers Challenge - March 2011: Yeasted Meringue Coffee Cake

Blog-Checking Lines: The March 2011 Daring Baker’s Challenge was hosted by Ria of Ria’s Collection and Jamie of Life’s a Feast. Ria and Jamie challenged The Daring Bakers to bake a yeasted Meringue
Coffee Cake.

Disclaimer: I was never very good at planning, nor food photography. Please excuse the crappy photos and obvious lack of "process" shots. I'm learning.

I can't tell you how relieved I am that this challenge turned out! This was my first challenge, and came directly on the heels of a long vacation.  Even though my last post saw me touting some DB Challenges as "doable", I have the tendency to get ahead of myself and not always think things through. Especially with baking. Especially with cakes. For supplementary material, friends can see my facebook statuses ca. my birthday (Feb 19) this year. In summary, quite a few attempted cakes resulted in failure, anger, and wasted ingredients.

Fresh out of the oven.
So I was very much relieved when this coffee cake came out of the oven, nut brown, circular, and somewhat bursting with meringue goodness. But the real surprise was the taste and texture. This coffee cake tasted very similar to a cake I used to eat as a kid! We called it "chocolate buffalo", for reasons unknown to me then and now. I'm pretty sure that "buffalo" was some obfuscation of "babka", but when I interrogated my mother about it further, she seemed pretty adament that it our beloved chocolate buffalo was something totally different. The mystery continues to this day.

Just look at that spiral! First piece, cross-section
checks out. Phew!
The texture of these cakes is amazing, especially warm from the oven. The cake itself is soft and chewy, and seems to get some moisture from the meringue layer, which appears to have melted into the dough. The filling, supported by a very stiff meringue, manages to stay put in the negative space of the cake rolls. Even after cutting, the spiral pattern formed by cake roll and filling remains clean and consistency. And I have to say, few things give me a better sense of accomplishment than a nice, clean spiral in cake cross-section.

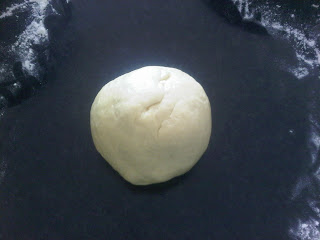
The star of the show: Sweet yeasted dough, before first rise.
This cake is also very easy to bake. I'm glad this was posted as a challenge, because it forces bakers to step into the world of yeasted cakes. Most bakers (myself included) don't bake with yeast as much as we should. We tend to think of yeasted and non-yeasted baking as two totally separate worlds. Although the thought of yeast baking can be a little intimidating, it's really quite simple and very rewarding. Yes, you have to put your results in the hands of a living organism, but now those in the audience may begin to understand how biologists feel.

I only have two tips to point out in this recipe, and both regard the yeast component.

First, although the recipe says to combine flour, sugar, salt, and yeast before mixing your wet dough ingredients, I would slow down here. Salt inhibits yeast activity, so I added the salt at the last minute, which is common for many bread recipes. I made my liquid mixture first, and then mixed the dry the ingredients together before combining the two mixtures.

Second, optimal yeast activity occurs with lukewarm water - not too hot, and not too cold. Too hot, and the yeast will die, and too cold, they won't go to work. I have a feeling that my liquid mixture was too hot when I added it to the dry ingredients. Be careful to only heat the liquids until the butter is just melted, and if it is too hot (ie. not lukewarm/warm), let it cool down a bit. I'm fairly certain that this could account for the lack of doubling in my dough.

One of the difficulties of working with yeast, if you're someone with anxiety problems such as Yours Truly, is that it is very easy to drive yourself crazy during the rising of your dough. A good rule of thumb for most rises, and what many recipes will indicate, is to cover your dough ball, and let it rise until it's "roughly doubled in size". Well, you can imagine how many times in the 45-60 minute period I popped the tea towel to check on the little guy. My dough definitely did not rise properly - after about 1.25 hours it was maybe 1.5x the size. This could be either due to the fact that my liquid was too hot (see above), or that, because I halved the recipe, there may not have been enough yeast and food for a true doubling to occur. Similarly, the second rise was pretty much useless, as I didn't notice a change in size whatsoever.

The rise is something that I really love about yeast baking, and has kind of inspired me to pursue more of it (next project; babka!). There is something really gratifying about kneading dough, and being able to feel the changes in elasticity, suppleness, and tackiness as your gluten network develops and the dough comes to life. And then, as if that wasn't enough, checking your dough after the first rise to find that it has grown massively is one of life's great ego-boosters. I think everyone should try it at least once.


Thankfully, and surprisingly, the cake still turned out great despite the minimal rising. So great that I've pretty much polished it off all by myself in two days. Though, that really isn't surprising knowing my eating habits. On a lighter note, the cake is actually kind of low cal/low fat. A look at the ingredients shows that there is very little sugar, butter, and eggs compared to most cakes - at least 1/4 of the amount in your usual cake, and far, far less calories and fat than certain old-school coffee cakes have. Which is great, because I always though that those kuchen were a real waste of calories and ingredients. I actually halved the chocolate, and the cake was still fantastic.

Here's the recipe. Enjoy!

Sunday, February 6, 2011

Ira is now a Daring Baker!

On a whim, I decided to sign up to be a Daring Baker. I've seen the work of various DB bloggers throughout the net, but I always thought that their challenges were really really difficult. However, tonight I came across the January challenge - a jaconde imprime, and my mind was suddenly changed. Yes, the jaconde looks difficult, but after reading about some of the steps involved, I realized that it wasn't really that hard. Just a lot of tedious steps. Or, if you will, it was totally French. The entremet, well, that may be a different story. We'll see.

I think this will be a good challenge, because it will force me to work on my baking chops on a monthly basis. The results will have to be posted for the entire internet to see, and therefore I'll have to stick with the program or face public shame. What's also kind of neat is that the Daring Baker challenges are very hush-hush. Who knew? The challenges are posted in a private forum once a month, and EVERYONE on the DH blogroll (and there are are probably dozens if not hundreds) has to post about it. You have to complete 8 out of 12 challenges per year, and if you miss two you're automatically booted -- without warning -- from the blogroll. Shame!

It sounds pretty hardcore, I know, but let's face it, I've slacked off on the blog, and I'm always down to waste time and ingredients on new baking challenges. Case and point: I'm never making baumkuchen again...


Sunday, October 3, 2010

Rigo Jansci recipe

by Rick Rodgers, taken straight from Kaffeehaus


Cake
1/2 c all-purpose flour
3 tbsp Dutch-processed cocoa powder
1/4 tsp salt
3 tbsp milk
3 tbsp vegetable oil
1/2 tsp vanilla extract
3 large eggs, at room temp.
2/3 c sugar

Filling
2 tablespoons golden rum or water (I used white rum)
1 1/2 tsp unflavoured powdered gelatin
1 tsp vanilla extract
1/2 cup confectioners' sugar
1/4 cup Dutch-processed cocoa powder
2 c heavy cream

Glaze
1/4 c hot water
3 ounces high-quality semi-sweet chocolate, finely chopped
1 tbsp unsalted butter, at room temperature

1/3 c apricot glaze, warm

1. For the cake: Put rack in centre of oven, and heat to 350 C. Lightly butter a 15 x 11-inch jelly roll pan, and line the bottom and sides with parchment or wax paper. Cut slashes in the corners of the paper to help them fold neatly. Lightly butter the paper.

2. Sift the flour, cocoa, and salt together into a bowl. Mix the milk, oil, and vanilla in a measuring cup.

3. Crack the eggs into a medium bowl and add the sugar. Using an electric mixer on high speed, beat until very light in colour and textgure, about 2 minutes. Sift half the flour mixture over the eggs and fold in. Fold in half of the milk mixture. Repeat with the remaining flour and milk mixtures. Spread evenly in the pan, being sure the batter fills the corners.

4. Bake until the cake springs back when pressed in the centre, about 15 minutes. Cool for 5 minutes on a large wire rack. Invert onto the rack and peel off the paper. Cool completely.

5. To make the filling: Pour the rum into a small bowl and sprinkle with the gelatin. Set aside for 5 minutes. Place the bowl in a skillet of gently simmering water. Using a small rubber spatula, stir constantly until the gelatin is completely dissolved, being sure to wipe down any undissolved gelatin on the sides of the bowl. Remove the bowl from the water, stir in the vanilla, and set aside to cool slightly.

6. In a bowl, combine the confectioners' sugar and cocoa. In a chilled medium bowl, beat the cream until it just begins to thicken. Sift the cocoa mixture into the cream and beat until barely stiff. Stir about one third of the whipped cream into the gelatin mixture, then beat back into the cream, beating until the filling is very stiff. (But do not overbeat, or it will separate.)

7. Cut the cake into two 7.5-inch wide pieces. Place on cake on a baking sheet. spread all of the filling on the cake in a thick layer, smoothing the sides. Refrigerate while making the glaze.

8. To make the glaze: Combine the water and chocolate in a small saucepan. Cook over low heat, stirring constantly with a rubber spatula, until the chocolate is almost melted. Remove from the heat and let stand, stirring occasionally, until the chocolate is completely melted. Add the butter and stir until melted and combined. Set aside to thicken and cool slightly.

9. Place the remaining cake layer, smooth side up, on a wire rack set over a jelly-rolll pan. Spread the apricot glaze over the cake and refrigerate to set. Pour all of the glaze on top of the cake. Using a metal spatula, smooth and coax the glaze over the sides, smoothing the glaze on the sides of the cake. Refrigerate until the glaze is set, about 15 minutes.

10. Using a thin, sharp knife rinsed under hot water between cuts, cut e the glazed cake into 9 rectangles. Following their original positions, arrange the rectangles on top of the filling. Refrigerate until the filling is set, about 1 hour. Cut between the rectangles to make individual servings. Serve chilled.

The mousse squares can be prepared up to 2 days ahead and stored under a cake dome in the refrigerator.

Apricot glaze
1 1/4 cups apricot preserves (jam?)
2 tablespoons golden rum or water (I used water)

Bring the preserves and rum to a boil in a small saucepan over medium heat, stirring often. Cook, stirring often, until the last drops that cling to the spoon are very sticky and reluctant to leave the spoon, 2 to 3 minutes. Strain through a wire sieve into a small bowl, pressing hard on the solids. Use warm.

Tuesday, September 21, 2010

Dateline: Budapest - Rigo Jansci!

Life's funny sometimes.

Just a month ago, if you were to ask me to describe Hungarian food - or, even, anything about Hungarian culture - I would probably be dumbfounded to offer anything outside of "paprika" as my answer. And even with that, truthfully, I would mostly be reminded of the absolutely amazing Satoshi Kon film (RIP Satoshi Kon, BTW, the world lost one of the best there was.) Second to paprika, I would probably think "some sort of really smelly sausage", courtesy of the boyfriend's penchant for using it in the Brazilian delicacy feijoada. Finding the Hungarian deli in town was one of the best days of his life, no doubt, but to me...meh.

But then, as luck would have it, we got ourselves a new room mate. A Hungarian! From Hungary! He's a P.h.D. student in Hungarian history, which makes a nice, and hilarious, contrast to the M.Sc. I'm chugging along on. He isn't a huge fan of the indigenous Hungarian food as I would have assumed, but he came with all sorts of melodrama when I found this:

Yep..another dessert cookbook! From the library, too! I bet you're all dumbfounded by that complete surprise. This book has "Ira" written all over it, for 1) the recipes, and 2) the blatant and gorgeous use of Art Nouveau design, typography, and embellishments within. Love it!

I showed the book to my roomie, making sure to point out that "Budapest" was on the cover, and then instructed him to choose something that was within my capabilities to bake for us. This was my chance to bake something Hungarian, expanding my repertoire to a whole TWO items.

After some consideration, we decided on Rigo Jansci (REE-go YAHN-shi) (again, blogger fails in the accent department - there should be one on the i). This translates to "Johnny Blackbird" in Hungarian. Yes, I know. It's weird, but at least there's an explanation.

Like many European desserts, this one is named after a person. And not just any person! Johnny Blackbird was, apparently, a gypsy violinist. And not just any gypsy violonist, but the most attractive  gypsy violinist ever. 

The story goes that in the late 1800s, Johnny was playing violin at a hotel in Paris. Watching his performance was the (former) Klara Ward - a milliionaire's daughter, and wife of Baron Chimay. Upon seeing Johnny, Klara was so taken with his good looks that she went so far as to take off her wedding ring and place it on his pinky. Can you believe that! 200 years later, that's some racy shit! I mean, really! Taking off your wedding ring IN FRONT OF YOUR HUSBAND, and putting it on some RANDOM MUSICIAN'S FINGER?! My God...

Anyways, she left her husband and two kids (ach!), and joined Johnny on his travels. Then, some Hungarian pastry chef named a "sinfully" chocolate dessert after him. Surprise surprse, the marriage didn't last, and he faded into obscurity. But Rigo Jansci, the dessert, did not.

Rigo Jansci has everything a chocolate lover would...well, love. It's like a chocolate sandwhich: chocolate sponge cake is the bread, and the "meat" (or whatever) is chocolate whipped cream, spiked with a bit of rum. On top, there is a chocolate glaze to make everything pretty. Admittedly, though, this isn't the super mega heavy chocolate orgasm that I was thinking. Actually, the chocolate taste is a bit subdued. I guess this is more representative of what the European tortes are like - more of an emphasis on texture and flavour combinations than overwhelming, huge, heavy cakes that North Americans are accustomed to.

Photo: Ira Sherr

And just to make sure things are going according to plan, I was able to double-check the appearance against an adorable watercolour from Cakespy.

Image: Cakespy

Yep, things check out. Phew!

The dessert isn't too difficult to make, either. But be warned, these tortes (and their similar desserts) are an exercise in preparation and assembly. There are a number of different components to make, so take some time to plan (ie. don't start this at 9 PM). The other somewhat comforting thing about these kinds of desserts is that they are all based on sponge cakes, so they are somewhat healthier for you (right? right?), and take far less time to bake. One baking sheet of sponge was prepared in about 10, and bakes in 15 minutes, and that's all you need for this recipe.

Perhaps the biggest victory for my Rigo Jansci was that I managed to impress some people! Apparently the roomie's coworkers - who may or may not be from Hungary, but know of said dessert - tried some and were pleased with the results. Diplomacy win!

In light of that, do expect more central European desserts in the future. Especially because Kaffeehaus is a phenomenal body of baking work.


Saturday, September 18, 2010

Rugelach...for "When the Schnecken Beckons"


In further efforts to re-create the noshes of my youth, today's project are Rugelach.

Rugelach are small, flaky pastries with a filling that contains any of chocolate, cinnamon, currants, and walnuts. And although they can look somewhat impressive and professional, you'll be pleased to know that the baking and assembly is quite simple.

The dough is made from a 1:1 mixture of butter to cream cheese, which makes them extremely flaky and, obviously, ridiculously fattening. Just do yourself a favour and pretend that we live in an age where nutritional information simply doesn't exist on food packaging, okay? You`ll want to make sure that the butter and cream cheese are beaten together for a good length of time so as to maximize the prospects of a delicious dough.

Traditionally, Rugelach are made by rolling the filling and dough into a large log, and slicing the cookies into small pieces. Case and point, the recipe I followed suggested this, but I decided to deviate on account of a) those pieces are too close to bite-sized morsels for comfort and/or portion control, and b) small spirals are prettier. I mean, really. Not wanting to end my rebellious streak there, I opted to replace the currants with semi-sweet chocolate chips, because I am crazy about the chocolate/walnut/sugar combination, and currants just seemed a bit...I dunno...healthy? 

Now, I was always under the impression that Rugelach and Schnecken were one and the same, but the good folks over at Schnecken Connection (Ira's endorsement for Best Name Ever), set the record straight: "Schecken" meaning "snail" in German, are pastries that are rolled (like mine), whereas Rugelach are result of the ol' log-and-slice technique above. Additionally, Schnecken are made with sour cream, and Rugelach of cream cheese So, I guess I really made a Rugelach-Schecken hybrid? The important thing is, we still have our health, and both these pastires descended from immigrant European Jewish communities.

For those not familiar with delicious, heart-attack inducing pastries of the Jewish heritage, you may remember them from their brief cameo in the 1996 film The Birdcage.


Photo: Ira Sherr

I have to give respect to Kate Zuckerman for this recipe - the butter-cream cheese dough is off the hook! I'm not sure how much it deviates or borrows from "traditional" rugelach recipes, but this is the first time I've made these, and I'm very pleased with the results. True to her claims, the dough is very flaky, but also has a nice sourness to it that is heavily addictive. I only wish that I had stuffed an irresponsible amount of filling into these little guys in order to maximize the flavour profile and play off the dough better. For those baking along at home, I would recommend at least doubling -- or even tripling - the dough recipe. I have nearly 3/4 of the filling left over, currently residing in my freezer. Thankfully, it's delicious and is one of those guilty pleasures you  could just eat by itself. Or if that seems too uncivilized for your tastes, you could probably dump it into yogurt for a sugary, impromptu `granola`.

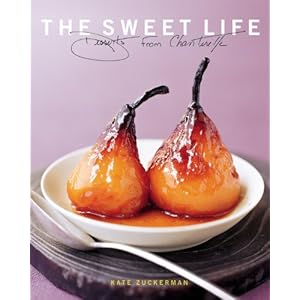
The recipe was taken from The Sweet Life, which is an amazing resource. More to the point, Kate is really friendly and very helpful - I know this because she's actually returned my emails! If you are looking for a dessert cookbook with solid, impressive recipes, I would highly recommend it.

Let the Schecken beckon!

Saturday, September 4, 2010

P is for Praxis...and Pfeffernusse

So, I've been doing some thinking these past few days.

Thankfully, I won't bore you with details, but the gist is: I have decided that I will start posting about my baking endeavours. Not that I intend bakegeek to be a play-by-play of what comes out of Ira's oven, but I want to share recipes and stories and successes (and occasional failures) with you all.

Without further delay, on with the show!

I picked up Greg Patent's wordly, "A Baker's Odyssey" at my super top secret source for cheap cookbooks, and I've been really impressed with it. Long story short, it celebrates America's immigrant heritage by going straight to the source for passed-down, ethnic creations that come from a variety of different Motherlands. There are tons of great recipes in here: breads, flatbreads, cookies, pies, yeasted breads, etc., and they come from as wide a range of countries as you'll probably find in any baking book (Germany, Sweden, Greece, Italy, Norway, Syria, Israel, Ireland, Lithuania, etc).

As I've always been one for learning about different cuisines, I was thrilled at the chance to bake from different cultures, as well. At this point, I've only had time to bake two recipes (I blame Committee Meetings), but there will definitely be more to come in the future. For now, I'm going to share the latest and greatest: Pfeffernusse. There should be an umlaut (sp?) on the u but I can't figure out how to insert it in Blogger's word processor.

Photo: Adam Dombovari
Pfeffernusse belong to a family of German cookies that seem to only be baked around Christmas time, which I think is a total shame. However, one thing you'll notice from this book is that a great deal of European baked goods - especially the really rich ones - are often baked either for a) Christmas, or b) before Lent. This was a huge shock to me. How can you resist only baking these things once a year? Why are there not riots in the streets? After speaking to a German friend of mine, he confirmed this to be the case ("Germans really only eat cookies during Christmas"). Well! Soorrrry for being a complete pig, then! I guess I'll never fit in in Germany. Which is probably for the best, because I don't think I could ace their pronounciation.

Pfeffernusse translates literally to "Pepper nuts", which means these cookies are a spicy little number, loaded with...you guessed it..nuts. Well, this recipe is a bit of a deviation from tradition, as they don't contain pepper or nuts (I haven't yet found whole, shelled walnuts to bake with, and I have a peanut allergy which makes me paranoid). Thankfully, there is more than enough flavour to compensate for both parties. The cookies utilize one of my favourite flavour combinations or cinnamon, nutmeg, and anise to give that lovely, deep, magical spiciness that does, in fact, remind me of the winter months. The spiciness even gets help from ground coriander seed, which works so well I turned a blind eye to the fact that I hate that vile plant and all of its associated life stages (Coriander = the seed of Cilantro - FACT). If you love that Spice Axis (think gingerbread), you'll enjoy these for sure.

The base of the cookie is a combination of honey, sugar, and butter, which gives a nice thickened cookie and a subtle sweetness. After baking into little domes, the cookies are glazed with icing sugar and then rolled...in more icing sugar. At this point, they kind of do resemble little igloos as the recipe indicates. The intense sweetness of the icing sugar makes a great contrast to the wonderful deep spiciness of the cookie. The texture is quite nice, too. After two days the cookies are a wee bit firm, but overall chewy. Apparently they can keep for two months, so this is something you can bake a good deal in advance and save...if you had that mysterious "self control" thing I hear so much about.

As for "A Baker's Odyssey" find out more here. I highly recommend it if you're a fan of home-baked goodness.

Friday, August 20, 2010

DIY Vanilla Extract


Photo: vanillareview.com
In all honesty, I had never seriously considered making my own vanilla extract. I couldn't seem to reconcile the time and expense required in homebrew with the opposing ease and convenience of buying it from the grocery store.


But I wanted -- nay, needed -- anise extract. And I couldn't find it in my local grocery stores. 
And I had just bought a whole bag of star anise on the cheap

So I started searching for DIY anise extract recipes. And I found one or two, but I also found the goldmine: the Make Vanilla Extract tutorial on vanillareview.com. It is so popular that the site branched off from its own Instructable! And it's even getting shout-outs in the press! 

This is easily the most comprehensive, detailed, and informative tutorial on making vanilla extract. Anywhere. And it seems pretty straightforward to me. There are tons of pictures, so all you visual learners can breathe easy. Unlike so much of anything on the internet, the site actually pulls from a really solid body of research to provide its background information. Yes, that includes literature reviews. Yes, there are even literature reviews on vanilla. No, you can't just quit your soul-crushing research job to go study vanilla all day. 

What is the most impressive, though, is that Ian is a serious sommelier! Check out his pages for salt, cinnamon, and paprika, in addition to all things vanilla. 


Related Posts with Thumbnails